Difference between revisions of "Getting Started"
| Line 5: | Line 5: | ||
== Request Account == | == Request Account == | ||
| − | NE Cluster maintains its own accounts | + | NE Cluster maintains its own accounts, independently of the UTK account registry. |
If you wish to request an account, please use this form: <b>https://necluster.ne.utk.edu/cgi-bin/account.py</b> | If you wish to request an account, please use this form: <b>https://necluster.ne.utk.edu/cgi-bin/account.py</b> | ||
| − | + | <!-- If you want to use the cluster, please email Ondrej Chvala <ochvala@utk.edu> the following information: a) what projects do you want the cluster for, b) which professor do you work with or which class this is for, c) your status withing UTK NE, d) forward your **RSICC request history email** (available from the [https://rsicc.ornl.gov/CustomerService.aspx RSICC website] [https://rsicc.ornl.gov/OrderHistory.aspx HERE]) to ochvala@utk.edu to get access to export-controlled codes available from RSICC. Do NOT send me your code license email or any other communication between you and RSICC. I need the actual request history email, not a screenshot. --> | |
== Getting Started on NECluster - Windows == | == Getting Started on NECluster - Windows == | ||
Latest revision as of 07:01, 12 November 2021
Contents
General Rules
Many people are using this resource for their research, be considerate. Maintain your long term disk usage in your home directory is below 10 GB. Before you run a large calculation, contact the cluster admin to optimize the job. The use of this system is regulated by Acceptable Use of Information Technology Resources Policy. Sharing your credentials with others, if you have access to export controlled codes, is punishable by up to 10 years in federal prison.
Request Account
NE Cluster maintains its own accounts, independently of the UTK account registry. If you wish to request an account, please use this form: https://necluster.ne.utk.edu/cgi-bin/account.py
Getting Started on NECluster - Windows
SSH Client
To connect to the cluster you will need an SSH client. The easiest one to use, in my opinion is PuTTY. You can either download a standalone executable, or use the installer to install everything.
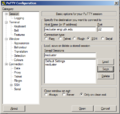
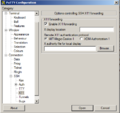
Once you've installed PuTTY you can just run it. A dialog window will pop up asking for some information. In the Host Name box you enter necluster.ne.utk.edu. Make sure the port is 22 and that SSH is checked. If you have a X Window Server (discussed next) and wish to use it, you also have to go to the X11 Category and put a check mark in the box next to Enable X11 forwarding. Note that on the first screen you can save your settings so that you don't have to type this in every time. Once done, click Open and enter your user name and password when prompted.
- PuTTY
X Server - remote GUI
If you want to use some of the GUI programs on the cluster, you will need to install an X Server on your machine. A nice freeware X Server for Windows is Xming. When downloading Xming, first install the package Xming and then install the package Xming-fonts. Get the public domain release. If you desire you can install Xming-mesa instead of Xming for additional graphics capabilities that probably will not be used over a network connection anyways.
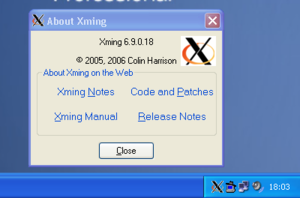
Once Xming is installed, you can run it from the start menu. It may seem like nothing is running after you click it, but if you check the application area of your task bar, you should see the Xming icon.
Note that you can start Xming before or after you start PuTTY. As long as you forwarded your X connection it will work.
MobaXterm
MobaXterm is an enhanced terminal for Windows with X server, tabbed SSH client, network tools, and more.
Getting Started on NECluster - Mac/Linux
If you're running Mac OS X or any version of Linux it's even easier to get on the cluster. You generally already have a SSH Client and X Server installed! To log on to the cluster open up a terminal window and type the command:
ssh -X -l user necluster.ne.utk.edu
OR
ssh -X user@necluster.ne.utk.edu
The -X forwards the X connection. You can omit it if you don't plan on using any programs that use it. Like Windows, most terminal programs allow you to save sessions that you want to use regularly.
It is advisable to learn a bit about the powerful ssh command, here are some links to start: http://tychoish.com/rhizome/9-awesome-ssh-tricks/ http://www.mynitor.com/2010/08/07/the-ultimate-ssh-tricks-manual/
Also you can create file ~/.ssh/config to tell how you want ssh to behave:
ForwardX11 yes
ForwardAgent yes
ForwardX11Trusted yes

Host cluster
        HostName necluster.ne.utk.edu
        User <your_username>
        IdentityFile ~/.ssh/id_rsa.UTKNEcluster
For newer releases of MacOS, you need to download X11 server separately, here: https://www.xquartz.org/ Make sure you switch on X11 forwarding when you connect using the ssh client.
First Time on the Cluster
Changing Password
The first time you're on the cluster the very first thing you will want to do is to change your password away from the temporary one that you were assigned. This is done by using the yppasswd command:
user@necluster ~ $ yppasswd
Changing NIS account information for user on nefiles.
Please enter old password:
Changing NIS password for user on nefiles.
Please enter new password:
Please retype new password:
The NIS password has been changed on nefiles.
Your password has been changed!
Pre-requisites for Computing on the Cluster
When you first log on your prompt will be:
user@necluster:~$
This shows that you are on the head node. Jobs can only be submitted from the head node. When you submit jobs they execute on compute nodes, named node# where # is the node number. You can connect to compute nodes that run your jobs. The very first thing to do is create a public key file so you don't have to enter your password every time you want to connect to a compute node. Also it allows the job scheduler to copy job related files between nodes. To do this, follow the following steps:
user@necluster:~$ ssh-keygen -t rsa
Generating public/private rsa key pair.
Enter file in which to save the key (/home/user/.ssh/id_rsa): Press <Enter>
Enter passphrase (empty for no passphrase): Press <Enter>
Enter same passphrase again: Press <Enter>
Your identification has been saved in /home/user/.ssh/id_rsa.
Your public key has been saved in /home/user/.ssh/id_rsa.pub.
The key fingerprint is:
Stuff
The key's randomart image is:
Funny boxed picture
user@necluster:~$ cat ~/.ssh/id_rsa.pub >> ~/.ssh/authorized_keys
user@necluster:~$ <done>
To connect to one of these nodes you can just SSH to it. Remember this only works if you have a job running that that node.
user@necluster:~$ ssh node15
Cluster MOTD Information
user@node15:~$
If you want to connect to a compute node which does not run your job, use an interactive job.
Common Problems
Sometimes, when messing with a cluster, something will break and I'll have to regenerate a compute node's SSH key. When this happens you will get a long error message telling you this when you try to log into a node:
user@necluster:~$ ssh node#
@@@@@@@@@@@@@@@@@@@@@@@@@@@@@@@@@@@@@@@@@@@@@@@@@@@@@@@@@@@ @ WARNING: REMOTE HOST IDENTIFICATION HAS CHANGED! @ @@@@@@@@@@@@@@@@@@@@@@@@@@@@@@@@@@@@@@@@@@@@@@@@@@@@@@@@@@@
IT IS POSSIBLE THAT SOMEONE IS DOING SOMETHING NASTY! Someone could be eavesdropping on you right now (man-in-the-middle attack)!
It is also possible that the RSA host key has just been changed. The fingerprint for the RSA key sent by the remote host is 93:a2:1b:1c:5f:3e:68:47:bf:79:56:52:f0:ec:03:6b.
Please contact your system administrator. Add correct host key in /home/user/.ssh/known_hosts to get rid of this message.
Offending key in /home/user/.ssh/known_hosts:377

RSA host key for node# has changed and you have requested strict checking. Host key verification failed.
The easiest way to fix this error message is to remove the relevant key so that when you connect to the node again you can add the new key to the file:
user@necluster:~$ ssh-keygen -R node#
/home/user/.ssh/known_hosts updated.
Original contents retained as /home/user/.ssh/known_hosts.old


